Neha from the Advisors Circle has put together a straightforward guide for making a small bust adjustment. While our newer patterns come with cup sizes to avoid the need for adjustments, many people still encounter issues with patterns being overly generous in the bust area. In such cases, a small bust adjustment (SBA) can make a significant difference in achieving a tailored fit. Over to you, Neha!
If you've ever felt that your clothes tend to look loose or awkwardly fitted across the chest, a small bust adjustment might be just what you need. It’s particularly useful when the pattern’s cup size is larger than your own.
Here's a visual walkthrough of how to perform a small bust adjustment:
---
**Step 1:** Begin by drawing a vertical line (Line A) parallel to the pattern's center front, extending from the shoulder down to the hemline. Ensure this line intersects the tip of the dart.
**Step 2:** Next, draw a second vertical line (Line B) parallel to Line A. Position this line slightly inward from Line A, closer to the center front. The space between Line A and Line B should be half the total amount of your bust adjustment. For example, for a 1-inch adjustment, place Line B 1/2 inch from Line A. For a 1/2-inch adjustment, position it at 1/4 inch.
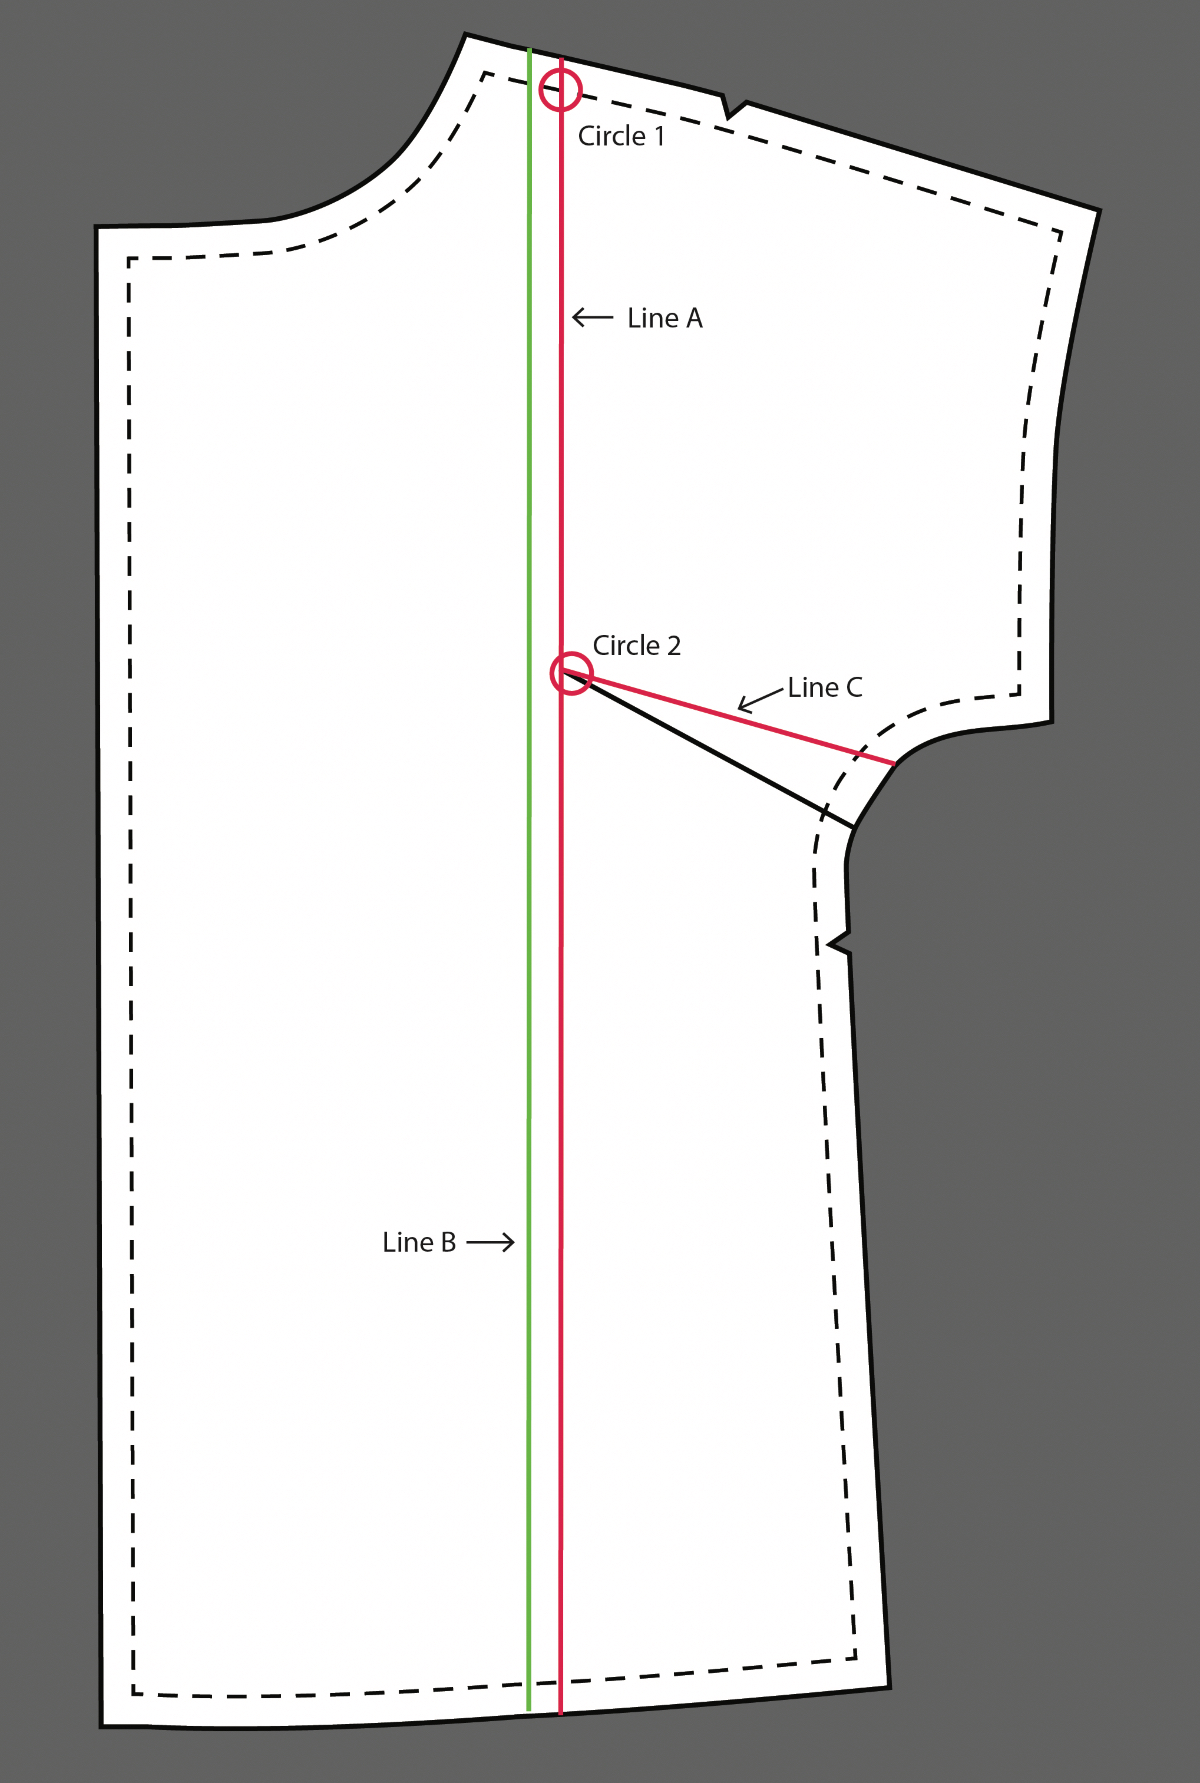
**Step 3:** Cut along Line A from the hemline upward toward the shoulder seam but stop short of cutting through the seam (denoted by Circle 1 on the diagram). This creates a “hinge†to rotate the pattern.
**Step 4:** Now, cut the upper portion of the dart (Line C) from the side edge all the way to its tip, again stopping just shy of cutting through (Circle 2).
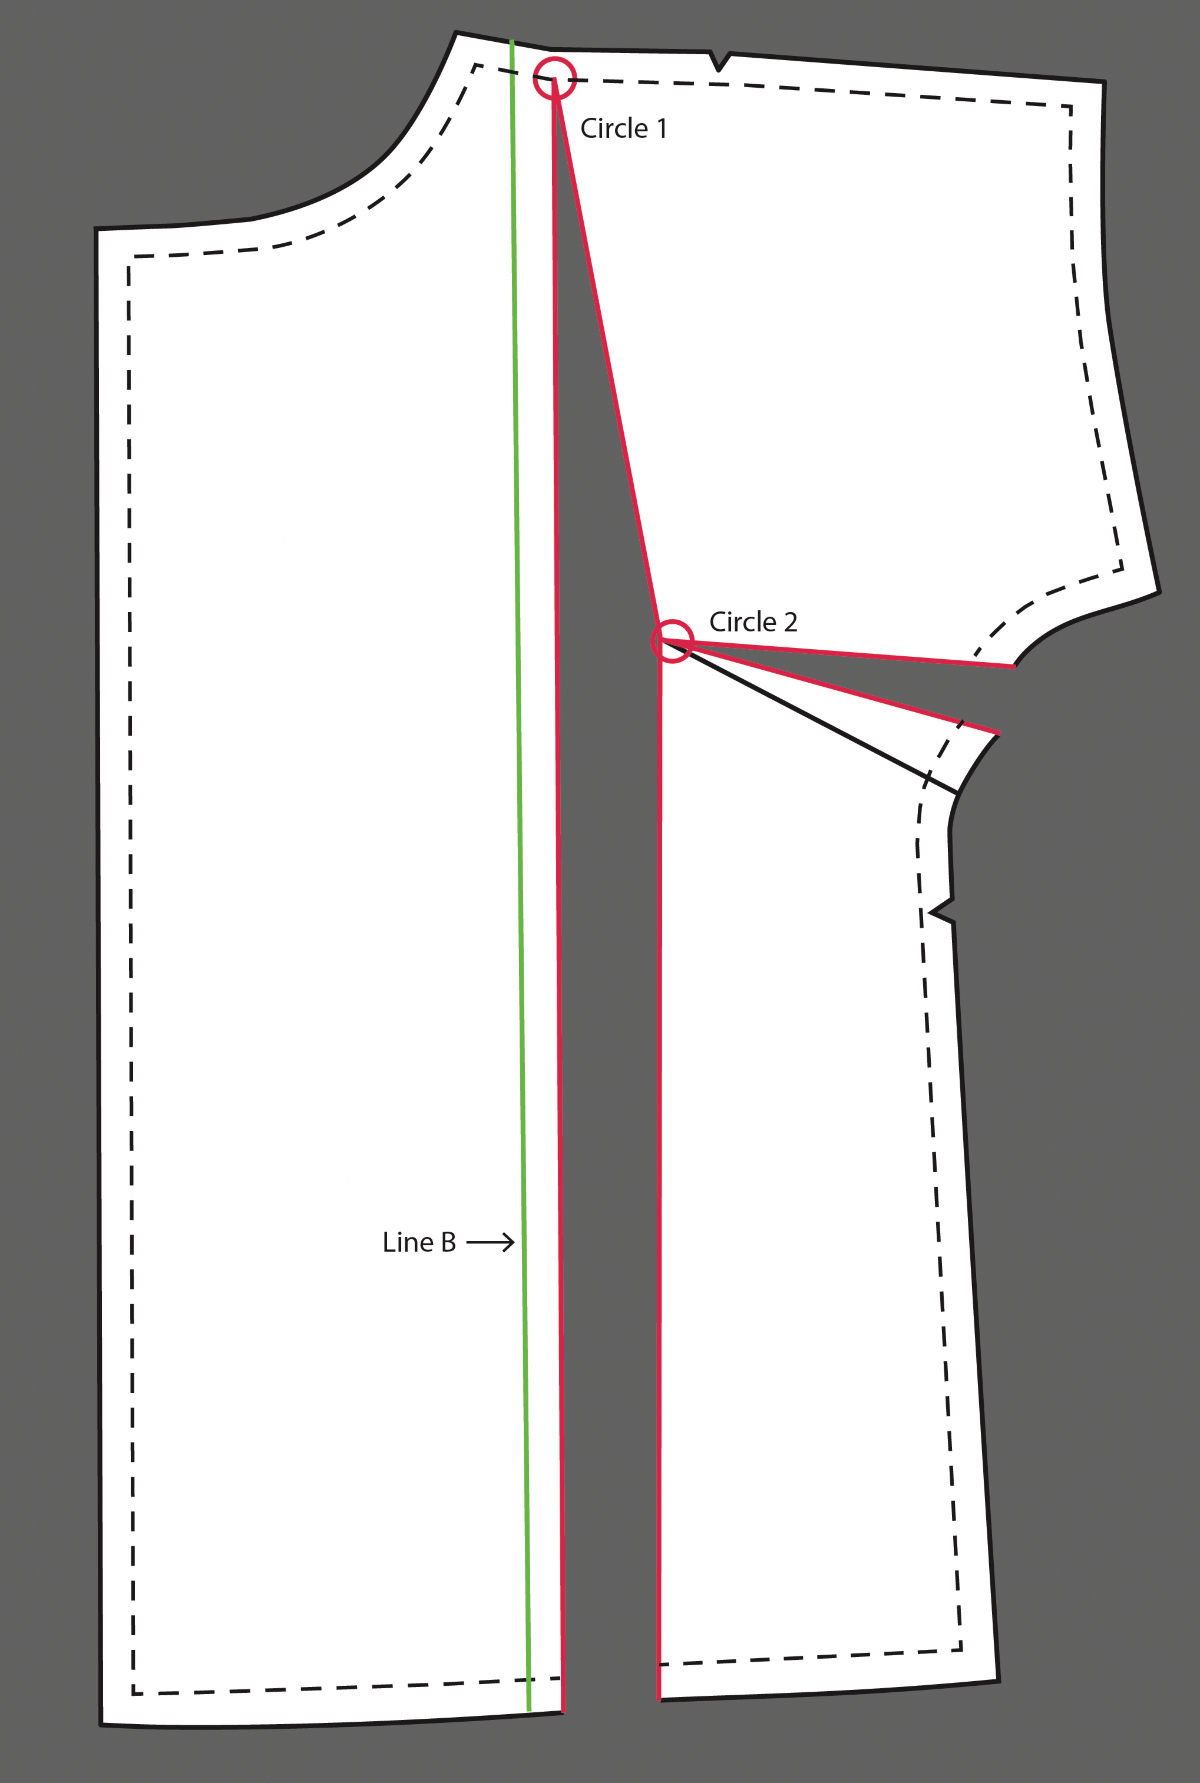
**Step 5:** Slide the cut pattern piece downward along Line A until it aligns with Line B at the dart tip. You’ll see some overlap between the two sections. Secure the overlap with tape.
**Step 6:** As you move the pieces, Line C—the dart—will pivot along its hinge and overlap the pattern further. Tape this overlap too. Your newly aligned edge becomes the new dart line. If the overlap creates a tiny dart, feel free to smooth it out, eliminating the dart entirely.

**Step 7:** Smooth out the side seam by redrawing a line from the sleeve hem down to the bottom edge, following the original curve of the pattern while trimming off any excess overlap.
**Step 8:** Finally, adjust the hemline by redrawing a curve from the side seam corner to the center front, mirroring the original pattern shape.
And there you have it! Your pattern is now adjusted to better suit your body.
---
I recently worked on the Weekend Getaway Blouse, which is designed for a B-cup figure. Since I’m an A-cup, performing an SBA gave me the perfect fit. If you’re unsure about your cup size, measure your high bust (just below your armpits) and full bust. Subtracting these measurements tells you your cup size: AA = 1/2 inch, A = 1 inch, B = 2 inches, C = 3 inches, and so on.
This simple technique works wonders for both close-fitting and semi-fitted garments, ensuring a more polished final product. Give it a try—you’ll be amazed at the difference it makes!
evening dress wear
Shaoxing Ruier Imp. & Exp. Co.,Ltd , https://www.pasatextiles.com