Sure! Here's the rewritten content in English:
---
Neha from the Advisors Circle has put together a straightforward tutorial for making a small bust adjustment. While our newer patterns already come with cup sizes to avoid the need for adjustments, many older sewing patterns often result in garments that are too loose in the bust area. For those who find themselves needing to tweak their patterns, a small bust adjustment (SBA) can make a big difference in achieving a better fit. Let’s dive into Neha’s method!
If you’ve ever felt like your clothes hang loosely or don’t quite fit around the chest area, a small bust adjustment could be just what you need. When a pattern’s cup size is larger than your own, it creates extra fabric where you don’t want it. By performing an SBA, you can eliminate this excess fabric and achieve a more tailored look.
To determine your sewing cup size, start by measuring your high bust and full bust. The high bust measurement refers to the circumference of your chest just below your armpits, while the full bust measurement captures the widest part of your bust. The difference between these two measurements will tell you your sewing cup size: AA = 1/2 inch or less, A = 1 inch, B = 2 inches, C = 3 inches, and so on.
Recently, I worked on a Weekend Getaway Blouse pattern, which was designed for a B cup. Since I’m closer to an A cup, an SBA helped me get the perfect fit. Below is a step-by-step guide to my small bust adjustment process.
### How to Perform a Small Bust Adjustment
**Step 1:** Begin by drawing a vertical line (Line A) parallel to the pattern’s center front, stretching from the shoulder to the hemline. Ensure this line passes through the tip of the dart.
**Step 2:** Next, draw a second vertical line (Line B), also parallel to Line A. Place this line between Line A and the center front, slightly away from the dart. The distance between Line A and Line B should equal half the total bust adjustment you plan to make. For example, if you’re aiming for a 1-inch adjustment, Line B should be 1/2 inch away from Line A.
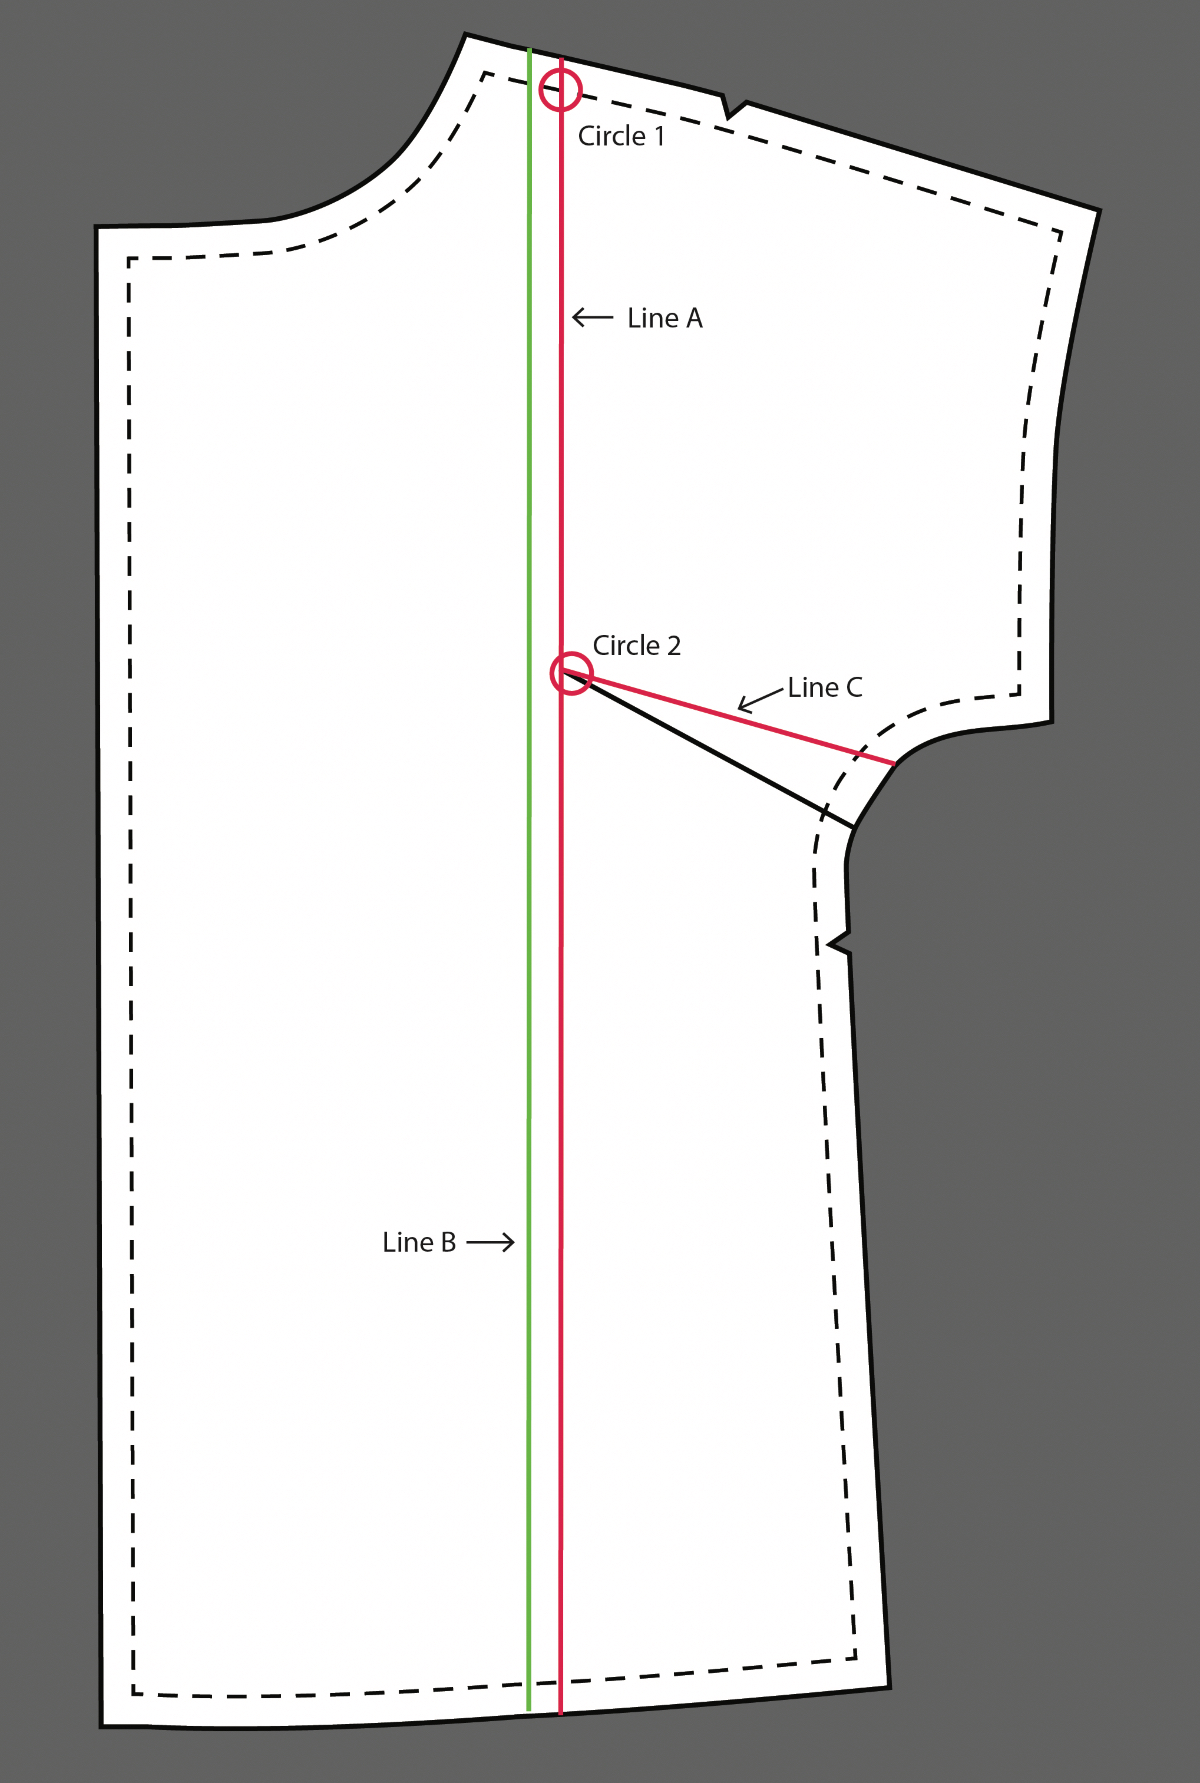
**Step 3:** Carefully cut along Line A starting at the hemline and extending upward toward the shoulder seam. Be sure not to cut all the way through the shoulder seam (indicated by Circle 1).
**Step 4:** Now, cut the top portion of the dart (Line C) from the side until you reach the tip of the dart, again being cautious not to cut through the dart itself (Circle 2). These cuts create hinges to allow for adjustments.
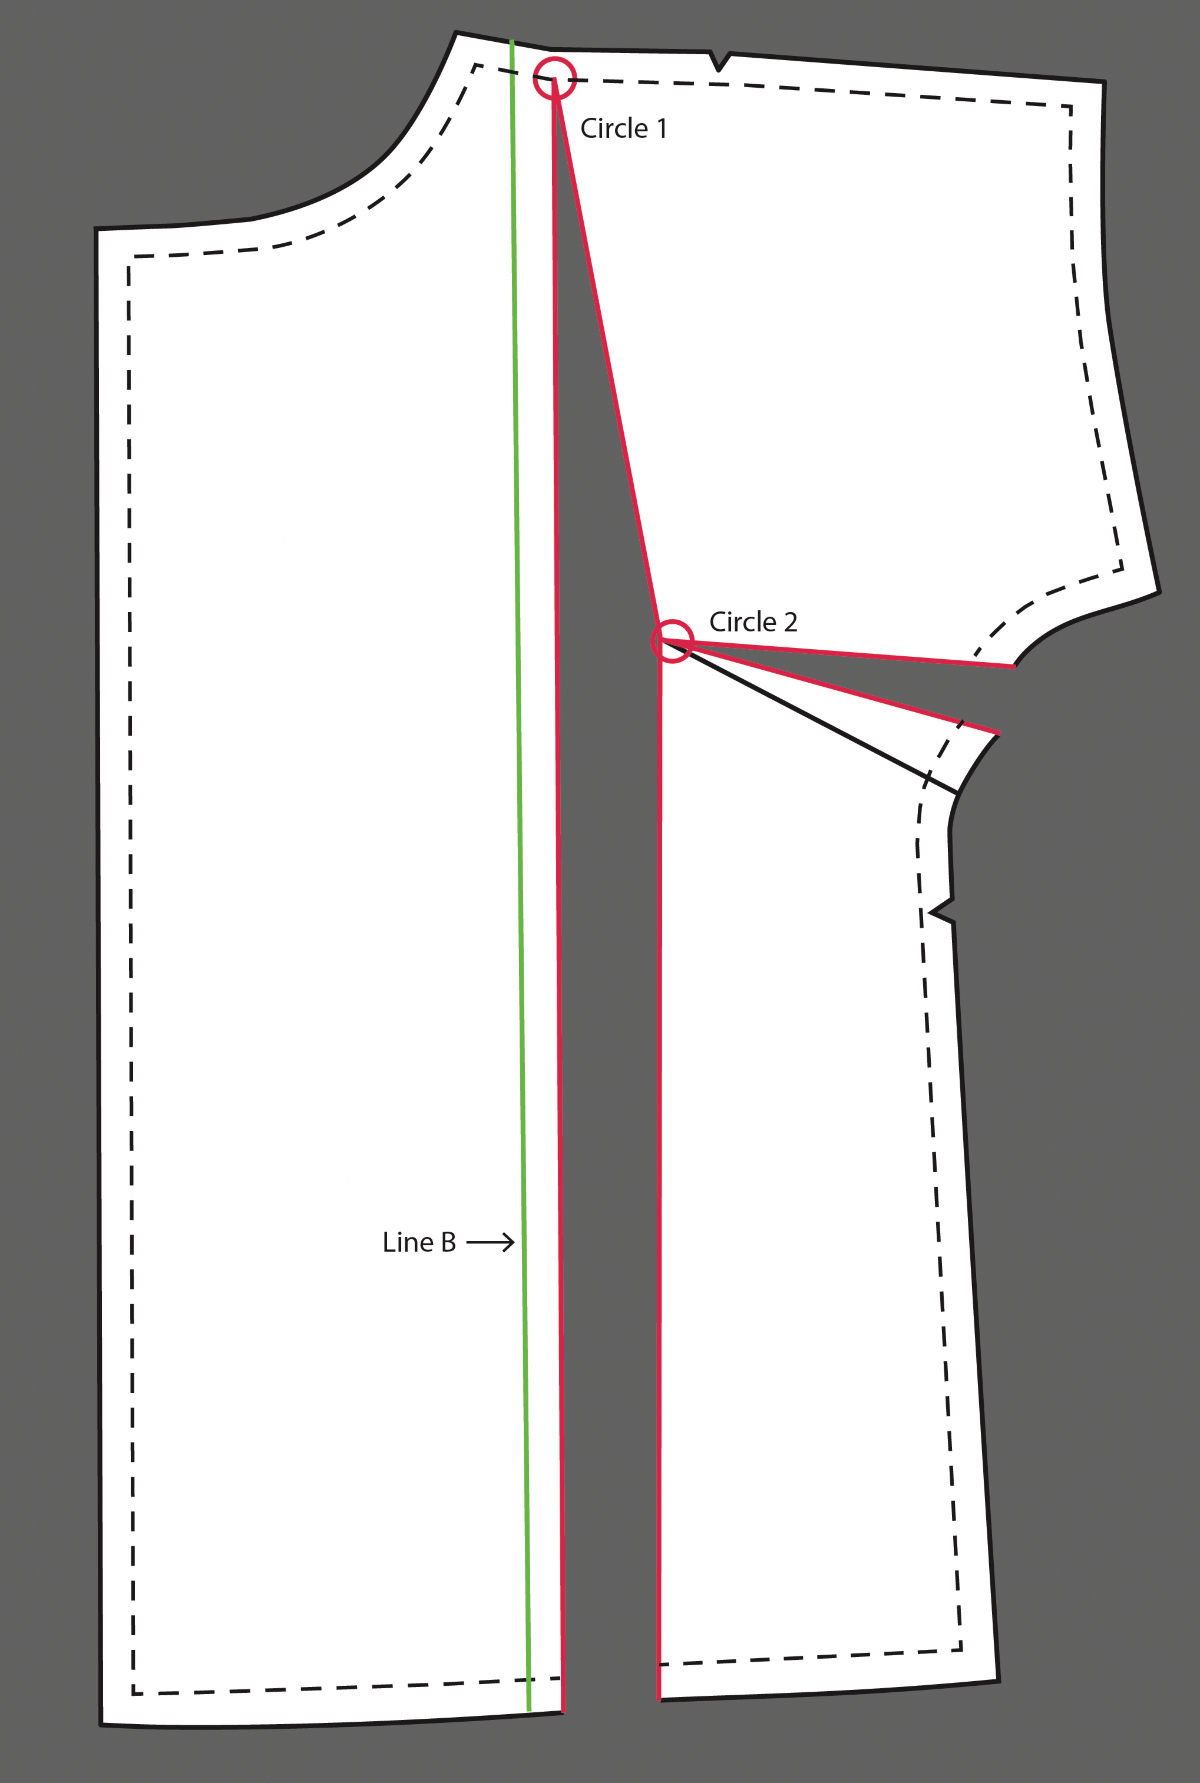
**Step 5:** Gently shift the pattern piece so that Line A aligns with Line B, beginning from the dart’s tip and moving downward. You’ll notice some overlapping of the paper. Secure the overlap using tape.
**Step 6:** As you manipulate the pattern, Line C (the dart) will rotate along its hinge and overlap the rest of the pattern. Tape this overlap as well. Your newly aligned cut edge becomes the new dart line. If the overlap results in a tiny dart, you can smooth it out completely, eliminating the dart altogether.

**Step 7:** Smooth out the side seam by redrawing a line from the sleeve hem down to the side edges, ensuring it follows the original curve of the pattern while removing any excess overlap.
**Step 8:** Finally, even out the hemline by drawing a new line from the side seam corner toward the center front, once again following the original pattern’s curvature.
And there you have it! With these steps, you’ve successfully transformed your pattern to better suit your body.
---
I hope this tutorial helps you feel more confident in customizing your sewing projects. Happy sewing!
evening dress wear
Shaoxing Ruier Imp. & Exp. Co.,Ltd , https://www.pasatextiles.com