Alright, here's a rewritten version of the content in English:
---
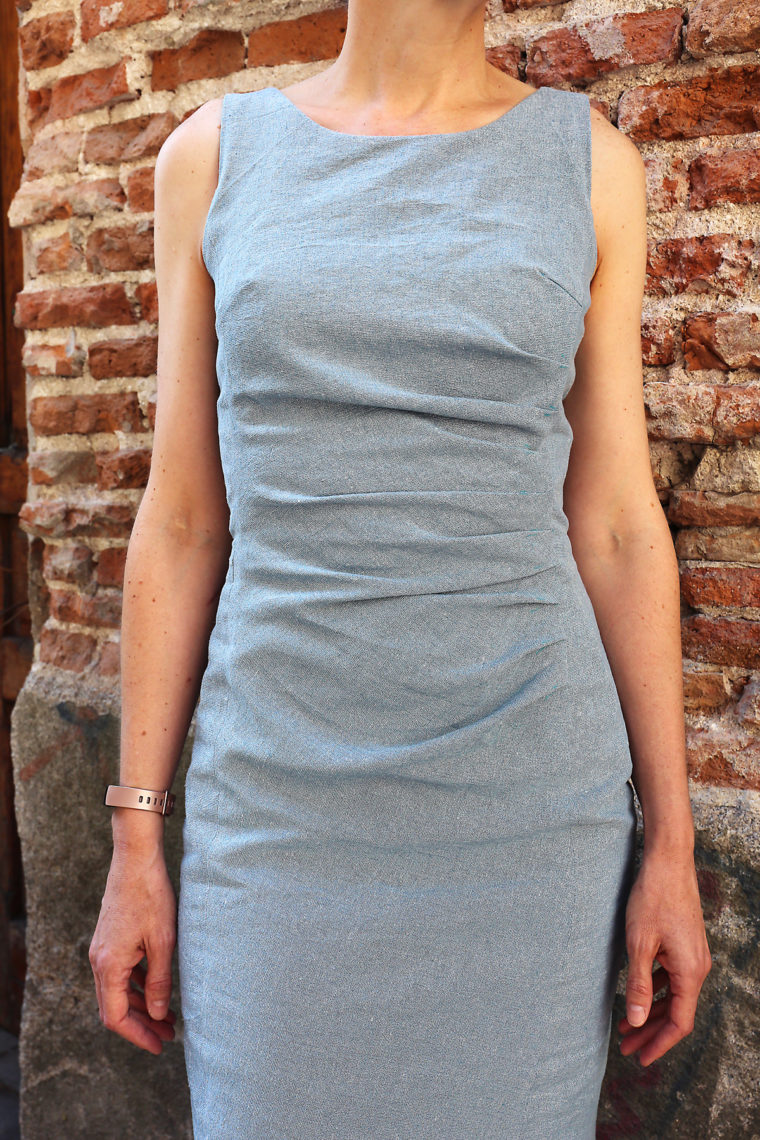
Earlier, I promised you a tutorial for a slightly adapted version of the Rush Hour Dress that I made for myself. Remember, the Rush Hour is also available in our updated extended size range! If you missed that post, you can check it out and see more photos [here](#).
Would you like to give this center-pleated version a try? The center pleats are quite flattering, and they're pretty straightforward to add. Let me walk you through the steps.
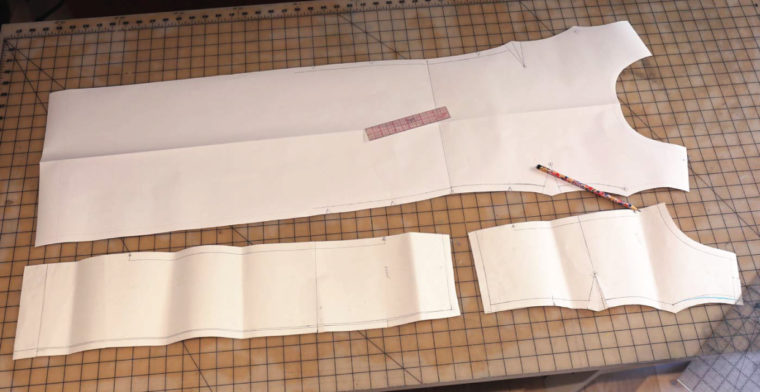
**Step 1:** Begin by merging and tracing the center front bodice and skirt panels, then flip them so you have one continuous piece instead of a cut-on-fold piece. To connect the bodice front and skirt front, align the seam lines at the side waist. Having a single full pattern piece allows you to add pleats—or gathers if you prefer.
Please note that I took these photos in the evening while working on the dress, so they’re not professionally lit. However, I believe they're clear enough for you to follow along, right?
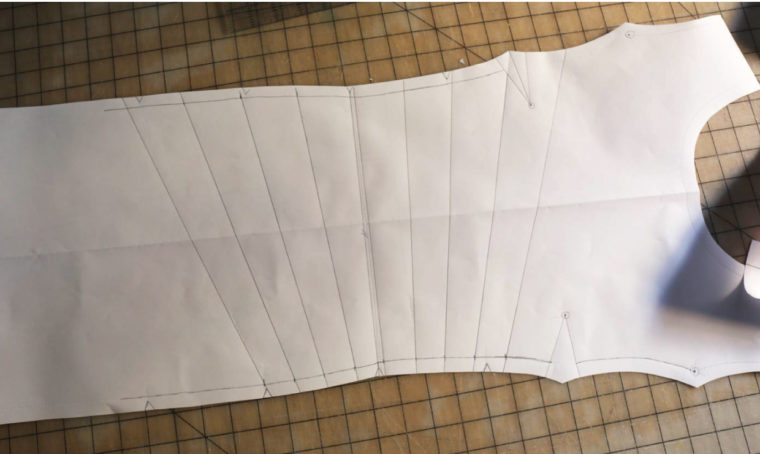
**Step 2:** Next, decide where you want to add your pleats or gathers. For my version, I wanted them to start just below my bust and end at my high hip. On the opposite edge of the front panel, I placed the pleats just above my bust and at my low hip. I drew lines to mark the top and bottom boundaries of these placements. A key tip: try to keep your pleats or gathers away from the bust darts to avoid complications.
**Step 3:** Time for some design decisions! Figure out how many pleats you'd like and space them evenly across the front panel. I went with nine pleats—no specific reason, really. (The original dress has eight, so feel free to experiment!) I typically fold a strip of paper until I’m happy with the spacing—check out the photo above to see what I mean. Alternatively, you could use a buttonhole spacer tool if you have one. Mark each pleat with a line.
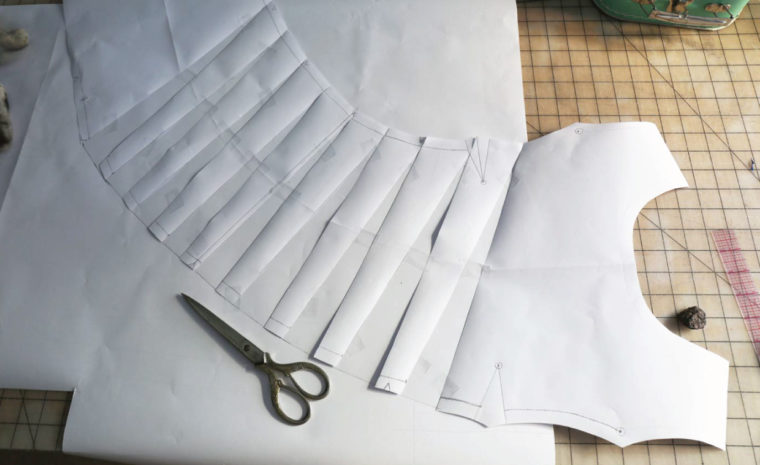
**Step 4:** Here comes the fun part! Carefully cut along your marked lines, leaving a paper "hinge" at the opposite seam line. (If you've got our Building Block Dress book, you'll recognize this technique.) Spread the cuts to form each pleat, keeping in mind that the gap will eventually be folded in half when sewn. I aimed to keep my pleats roughly the same size and ensured the lower part of the skirt aligned almost perpendicularly with the bodice, similar to the original dress. The fabric's stripes helped guide the grain.
Be mindful not to over-spread the pleats to the point of overlapping, but also ensure they're visible enough. Once satisfied with the pleat placement, secure the pattern by taping it onto another sheet of paper.
**Step 5:** Ideally, you should now fold each paper pleat in the direction it will take when sewn. Notice that on the original dress—and my version—the pleats don't all fold in the same direction but change at the waist. After folding the pleats, trim any excess paper beyond the cutting edge. I skipped this step (rushed things a bit), but I recommend doing so to make folding the pleats easier later. If you plan to gather or ruche your fabric, blending the outer cut edge should suffice.
Here's my finished pattern piece. If I had folded and trimmed it correctly, it would have pointed dart-like shapes at the bottom right.
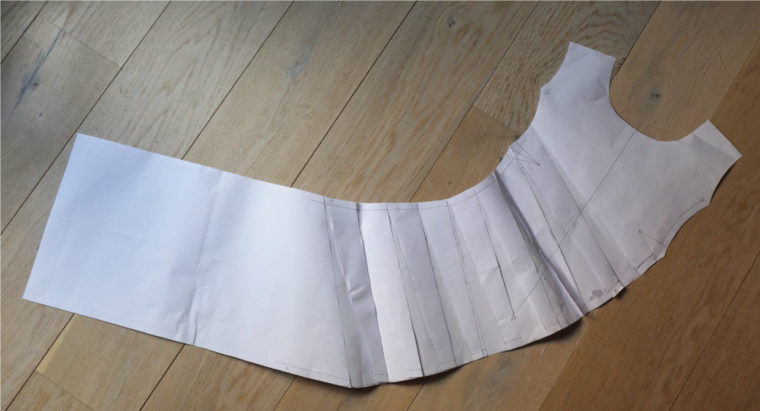
It's an unusual shape, isn't it?
When cutting the fabric, I used the original grain line at the upper bodice, which resulted in the skirt being off-grain. That’s okay in this case. It could also be fun to adjust the pattern so the skirt hem aligns perfectly with the cross grain, 90 degrees from the original grain line, making hemming simpler. Doing so would require slightly larger pleats than mine, though my pleats aren’t overly large anyway. I followed the original dress’s photo, which also landed slightly off-grain.
To sew this modification, finish the darts before creating the pleats. Fold the pleats into place and baste them in the seam allowances. Proceed with the rest of the dress as usual—nothing fancy required. Easy, right?

I hope you’ll give it a shot and let me know how it turns out! Be sure to tag us @liesandco and #rushhourdressblouse on Instagram if you make this. I’d love to see how it goes!
---
Let me know if you'd like further adjustments!
Hand Woven-Yarn,Hand Knitting Yarn,Colorful Magic Knot Yarn,Magic Knot Yarn
ZHANGJIAGANG WELLHOW TRADING CO., LTD. , https://www.wellhowyarn.com